You can add groups from the teacher dashboard, and you need to add at least one group before you can add students. If you have multiple choirs or classes that you want to add to the site, adding a group for each can be helpful with organization and reports.
Adding a Group
To add a group, simply click Add a Group, enter a name for the group and click Create Group. Then click the Dashboard button to return to the dashboard and add students or add another group.
Selecting a Group
Once you’ve added your groups and students, you can get some info at a quick glance on the Enrolled Users table.
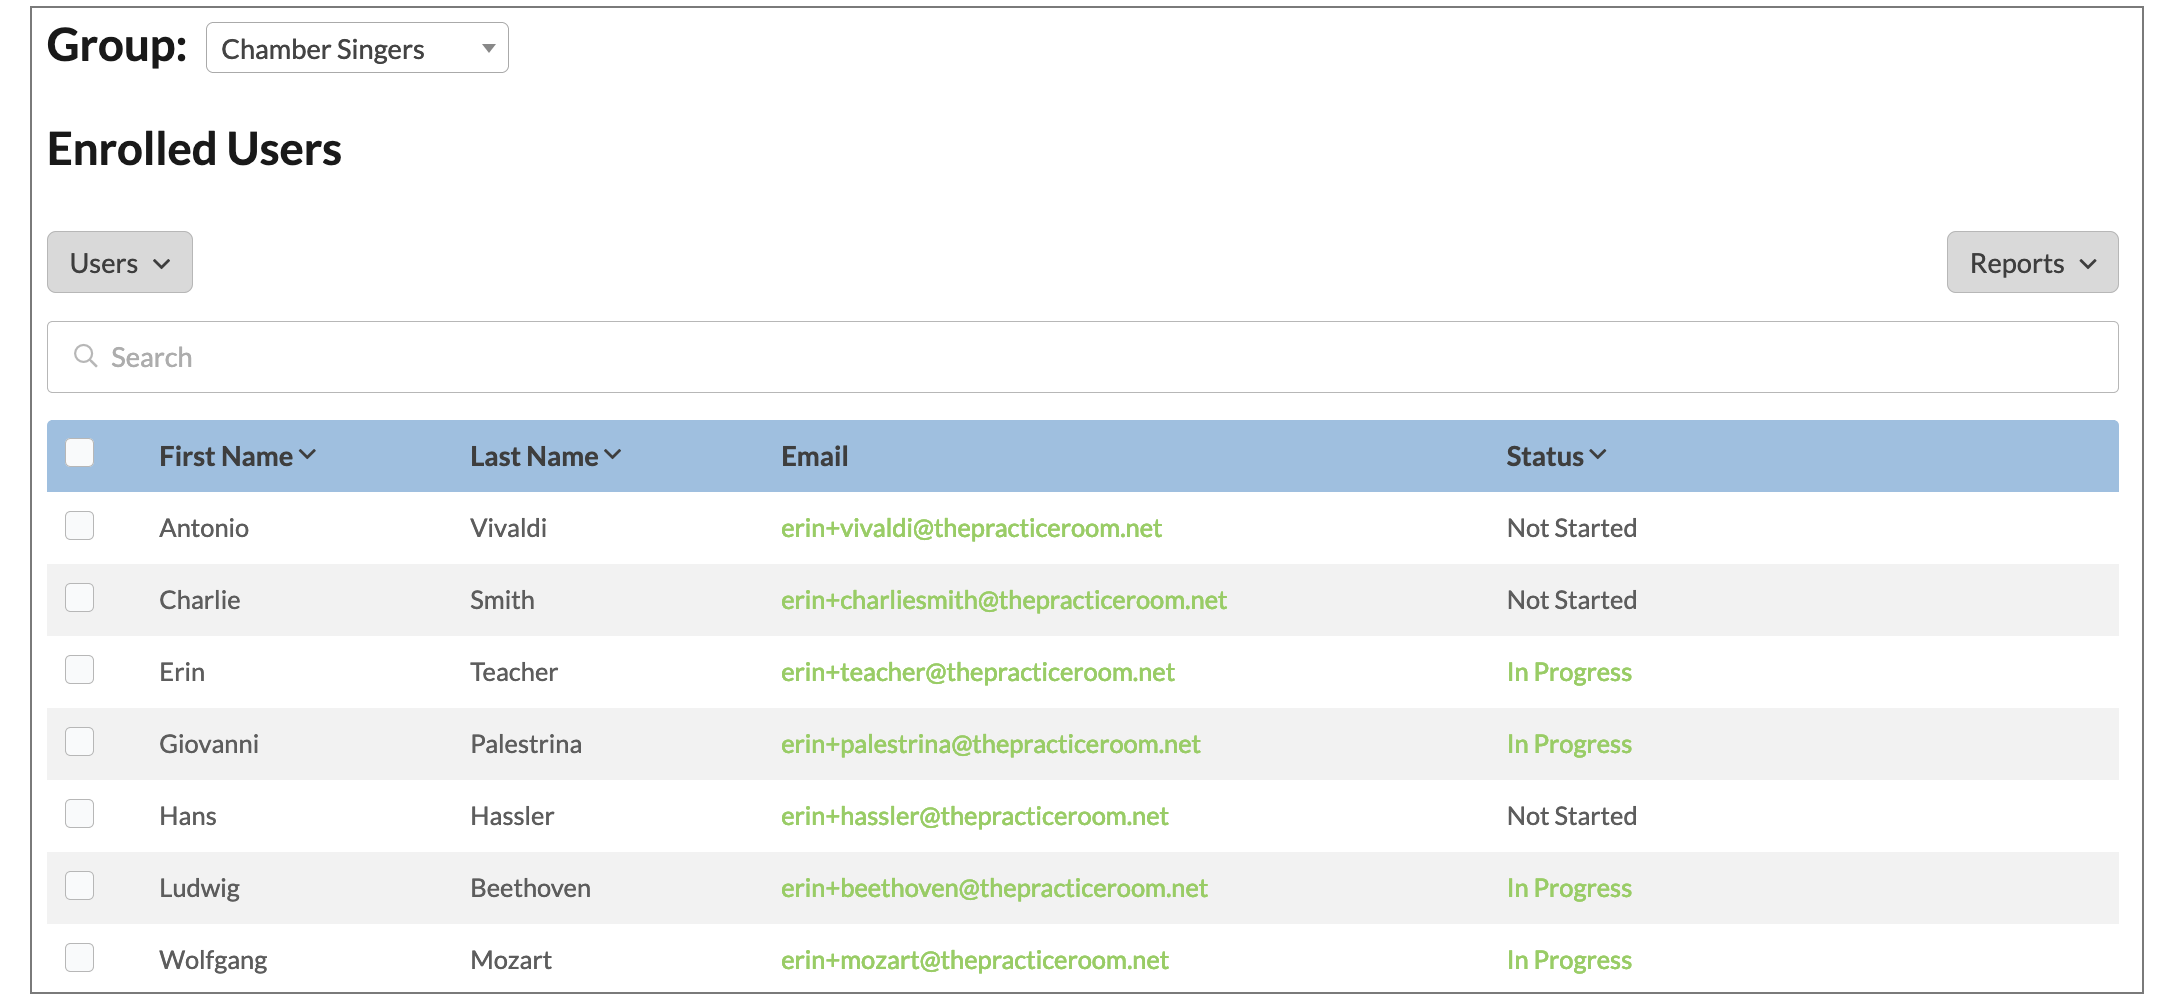
Aside from their name and email address, you can also see their course status. If they have started working on courses it will show In Progress. Clicking on the In Progress button will take you to a filtered Course Report for that specific student.
You can also see the student enrollment key, so you can quickly check to see which keys have been used.
By default, this table displays 20 students at one time, but you can change that by clicking on 20 per page at the bottom of the table.
If you have a lot of students (Yay!), you can search for a specific student using the search bar at the top of the table. As soon as you start typing a name, the list will be filtered.
Deleting a Group
To delete a group, first remove all the students. When you are the only one left in the group, a “Delete this group” button will appear to the right of the group name. Click it and confirm the pop up to delete the group.